WordPress is one of the most popular Content Management Systems (CMS) in the world, powering over 40% of all websites on the internet. One of WordPress’s key features is its user-friendly interface, allowing users to create and edit website pages efficiently. Whether you are a business owner, blogger, or website developer, learning how to edit WordPress pages is essential. It will assist you in keeping your website up-to-date and engaging for your audience. To get started with how to edit a WordPress page, you need to understand how WordPress pages work.
Understanding WordPress Pages
WordPress pages are static web pages created to display content that only changes occasionally. They are different from posts, which show a range in chronological order. Pages are used mostly in creating an About page, Contact page, Privacy Policy page, and other similar pages.
Each WordPress page has its URL (e.g., “www.webadent.net/about-page” Or “www.webadent.net/contact“), making it easy to share the page. Pages can also be organised into a hierarchical structure, making creating a navigation menu for your website easy.
WordPress pages can easily be created and edited using the WordPress block editor (Gutenberg) and customised further with themes and plugins.
With some knowledge and practice, you can create professional-looking pages to help you achieve your website goals.
Key Takeaways
- Understanding the difference between pages and posts is essential to editing WordPress pages.
- The WordPress block editor is a user-friendly tool that allows you to create and edit pages on your website easily.
- Learning how to edit WordPress pages is essential for website owners and developers.
Accessing Your WordPress Dashboard
To edit WordPress pages, you must first access your WordPress dashboard. It is the central hub where you can manage all aspects of your website, including pages, posts, themes, plugins, and more.
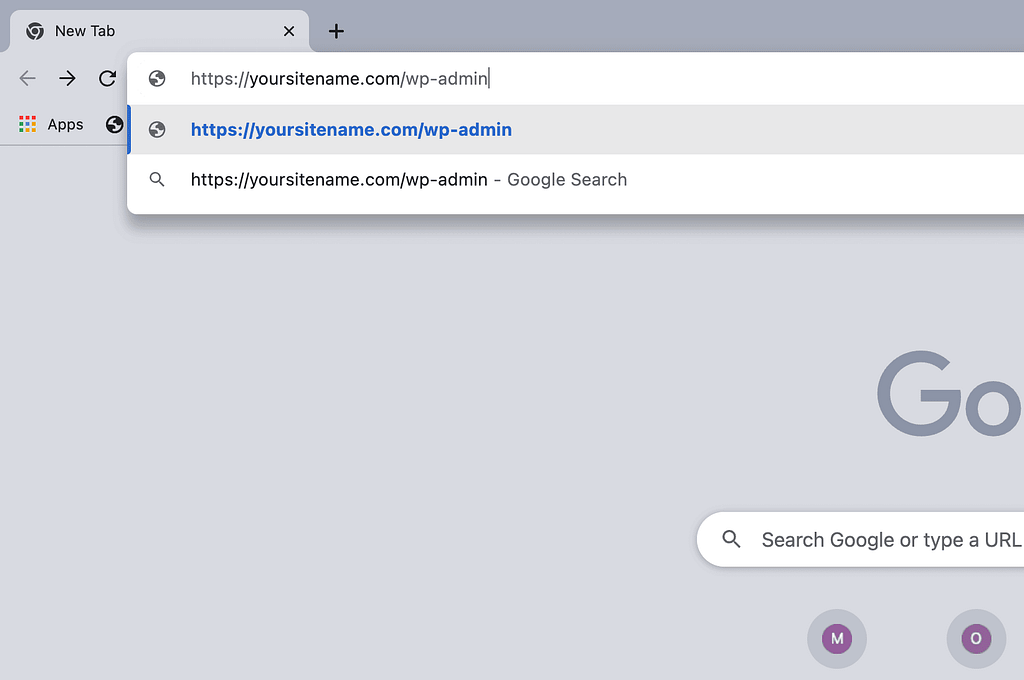
To access your WordPress dashboard, you must log in to your website. You can add “/wp-admin” to the end of your website’s URL. For example, if your website is www.example.com, you would go to www.example.com/wp-admin.
Once you arrive at the login page, enter your username and password to access your dashboard. If you have forgotten your login credentials, click the “Lost your password?” link to reset your password.
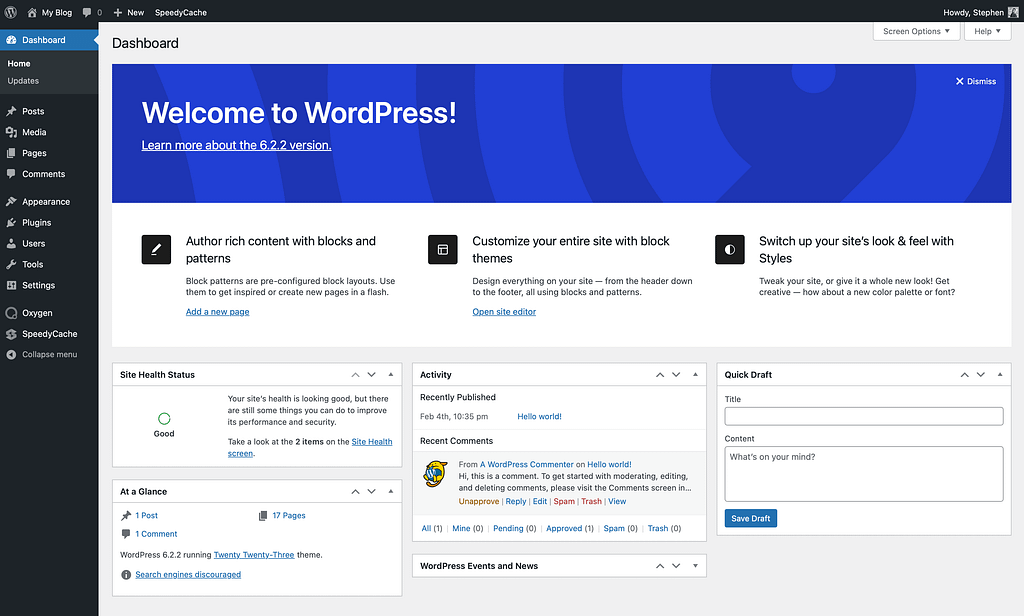
After putting your credentials, you will get logged into your WordPress dashboard. The dashboard diverges into several sections, including the At a Glance section, which overviews your website’s activity. It also includes the Quick Draft section, allowing you to create new posts or pages quickly.
Accessing your WordPress dashboard is the first step to editing your website’s pages. By logging into your dashboard, you will get identified as a user, and with this access, you can easily streamline your workflow by customising the sections to make it easy to manage your website.
Navigating to Pages Section
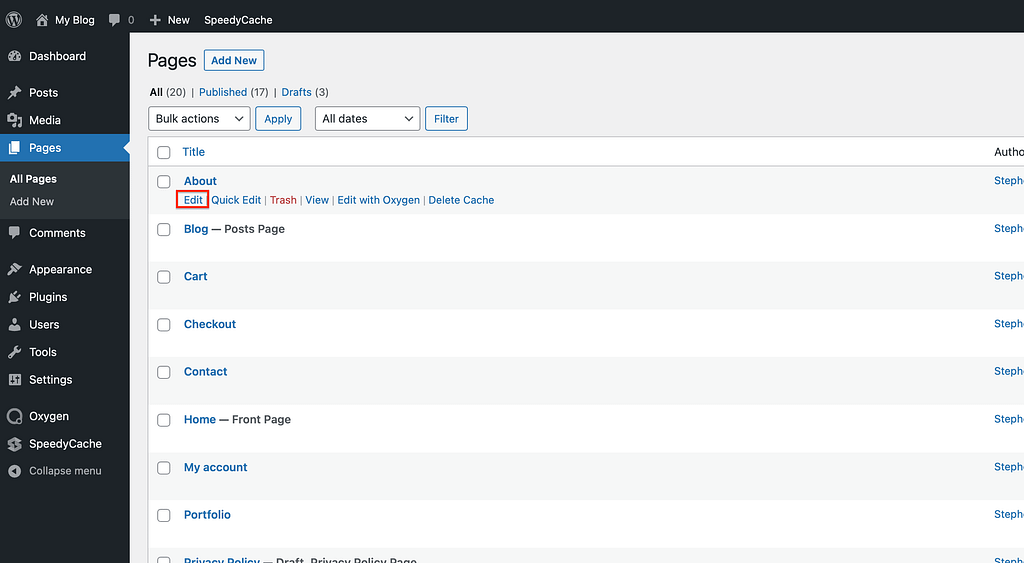
To edit a WordPress page, once you log in as a user, you will navigate to the Pages section, where you can view all the site pages, edit existing ones, and add new pages.
To navigate to the Pages section, once logged in, you can easily find the Pages section on the left-hand side of the dashboard. The Pages section is represented by an icon of two pieces of paper stacked on each other, as shown in the image below.
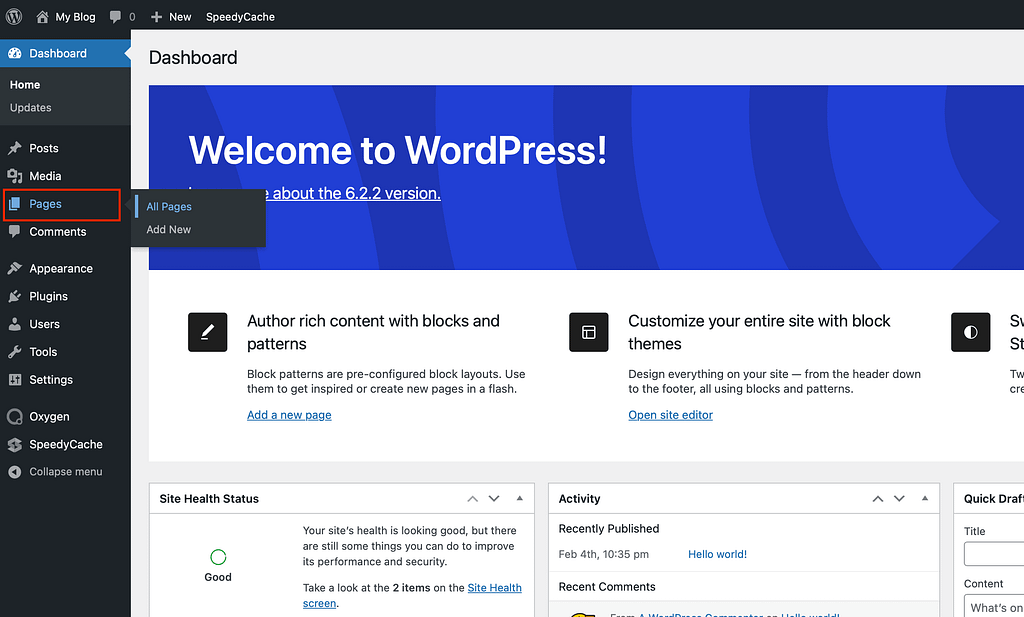
Clicking on the Pages icon will take you to the Pages screen. The Pages screen displays a list of all the pages currently on the website. The list includes the page title, author, date published, and the page’s status (draft, published, or pending review).
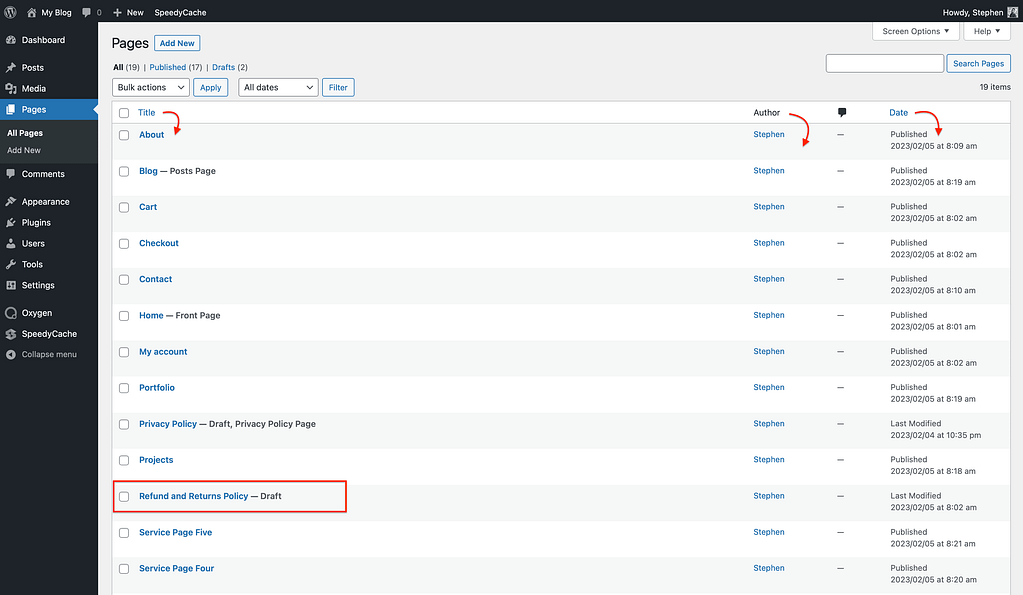
The Pages screen also includes several options for editing pages. You can then hover over a page title and click the Edit option to edit the page. You can also click the Quick Edit option to quickly modify the page title, slug, date, and status.

In addition, a user can use the Bulk Actions feature to edit multiple pages simultaneously. To use the Bulk Actions feature, the user must choose the pages they want to edit by checking the boxes next to each page title. They can select the Edit option from the Bulk Actions drop-down menu and click the Apply button to take them to a screen where they can simultaneously change all the selected pages.
Overall, navigating to the Pages section in WordPress is a simple process that allows users to view and edit the pages on their website easily.
Creating a New Page
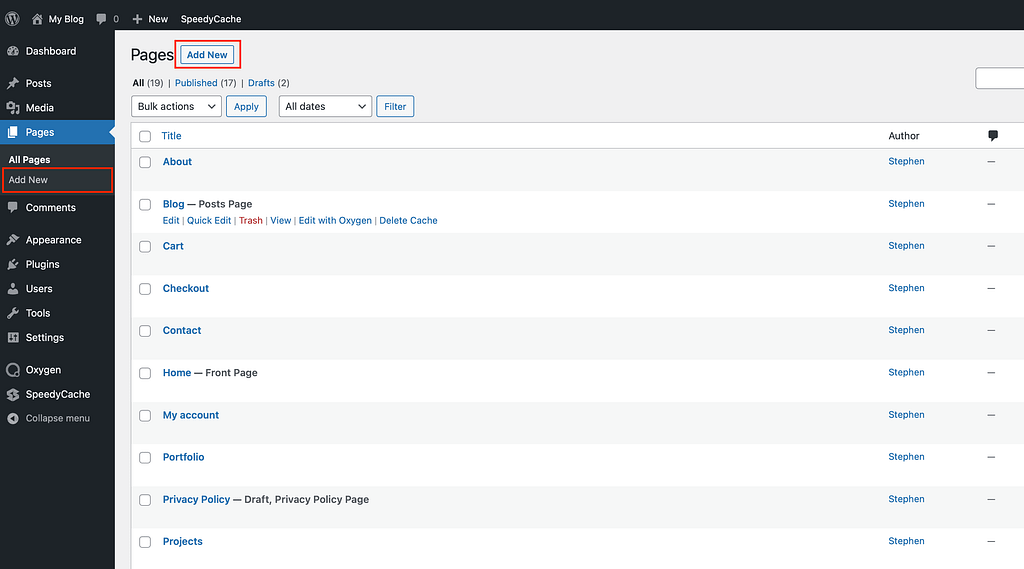
To create a new page in WordPress, log in to the site’s WordPress dashboard and navigate to the Pages section. Then click the “Add New” button to create a new page.
Once you get to the page editor, you can add content to your new page using the block editor’s formatting tools to add text, images, videos, and other media types to the blank page. The editor also enables its user to add custom HTML and CSS code to their pages for more advanced customisation.
It is a best practice to give the new page a descriptive title and choose a permalink that accurately reflects its content, as it will help optimise the page for search engines and make it easier for visitors to find the page on the website.
In page creation, WordPress also permits a user to assign the new page to a specific parent page or add it to a custom menu to help with website organisation and navigation.
Finally, you can save your new page as a draft before publishing it, allowing you to quickly review and edit it before publishing it live on the website.
Overall, creating a new page in WordPress is a straightforward process that allows users to add new content to their website quickly and easily.
Page Title and Permalink
When creating or editing a page in WordPress, paying attention to the page title and permalink is essential. The page title is the main heading on the page and in the navigation menu. The permalink, also known as the URL, is the web address that directs users to the page.
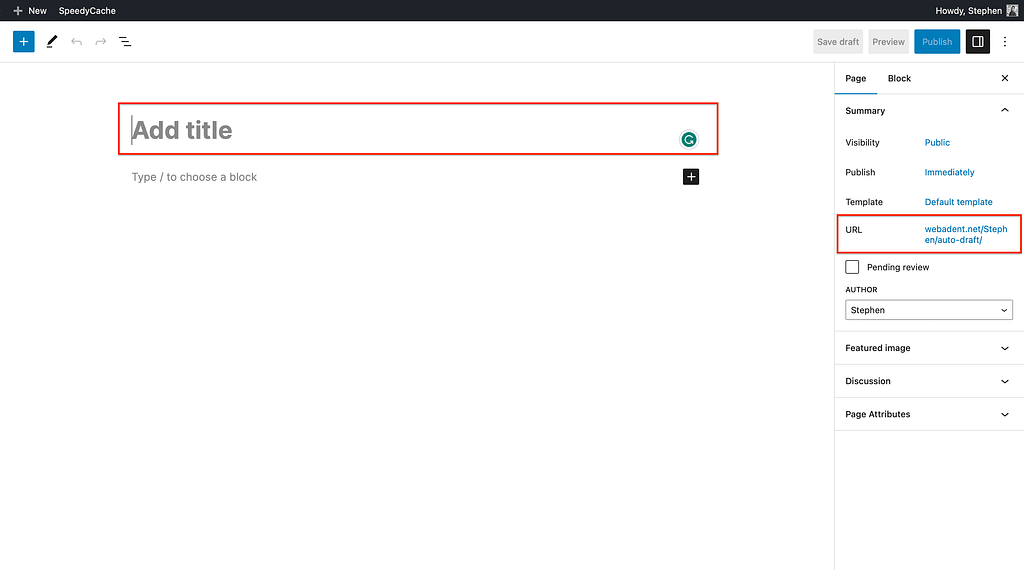
To edit the page title, navigate to the page editor and click on the title field. Here, you can change the text to whatever you want, the page title. It is important to note that changing the page title will not automatically update the permalink.
Click the “Edit” button or click on the URL in the page settings field indicated in the above image to edit the permalink. It will allow you to easily change the URL to something more appropriate for the page. Keeping the permalink short, descriptive, and easy to remember is recommended.
In summary, paying attention to the page title and permalink is essential when editing a WordPress page. The page title should accurately reflect the page’s content, while the permalink should be short, descriptive, and easy to remember. It is best to edit the permalink before changing the page title to avoid issues with links or search engine rankings.
The WordPress Block Editor
The WordPress Block Editor, also known as Gutenberg, is a powerful tool allowing users to create and edit pages easily. It is a visual editor that uses blocks to organise content. Each block represents a different type of content, such as text, images, videos, and more. This section will explore how you can easily use the WordPress Block Editor to create and edit pages.

Adding Blocks
To add a block to your page, click the “+” icon in the editor’s top left corner, and it will open up a menu of available blocks. From here, you can select the type of block you want to add, such as a paragraph, image, or video.
Once you have selected your block, it will appear on your page. You can customise the block by adding your preferred text, images, or other content to be displayed on the page. You can also adjust the block’s settings by clicking on the block and selecting the “Block Settings” option.
Moving Blocks
To move a block, click on the block and drag it to the desired location. You can move blocks up or down within or between the page, making organising your content and creating a visually appealing layout easy.
Deleting Blocks
To delete a block, click on the block and select the “Delete” option. And this will remove the block from your page. You can also undo this action by clicking the “Undo” button in the editor’s top left corner.

Customising Blocks
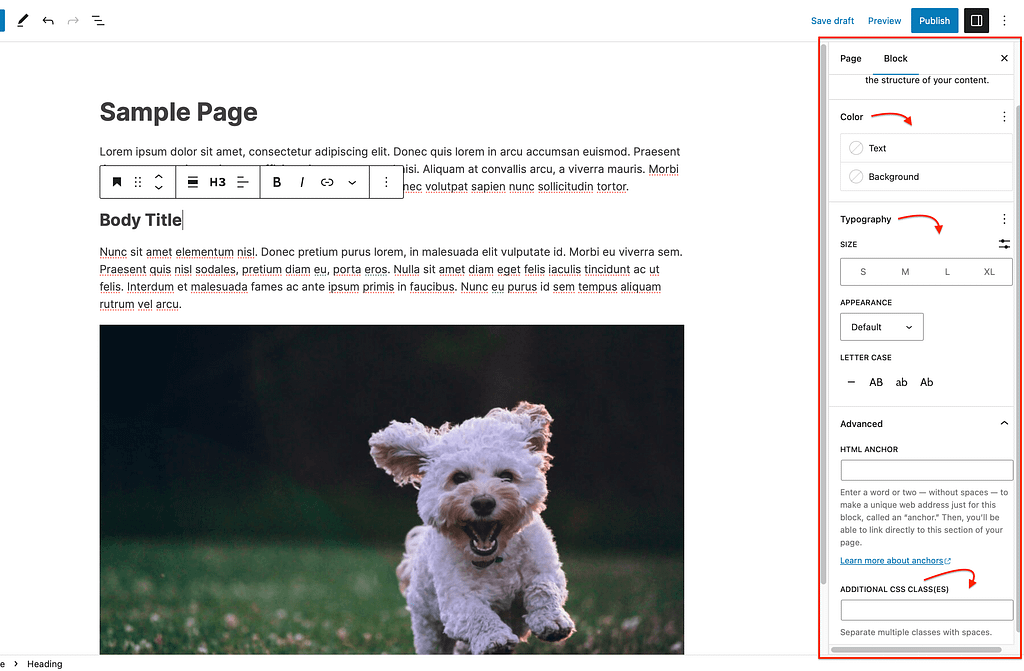
The WordPress Block Editor allows users to customise their blocks in various ways. You can change the colour, font, and size of text blocks. You can also add custom CSS classes to blocks, allowing even more customisation options.
In addition, the WordPress Block Editor supports third-party plugins that can add even more functionality to your blocks. For example, you can add a plugin to embed social media feeds or create contact forms.
Overall, the WordPress Block Editor is a powerful tool allowing users to create and edit pages easily. Users can create visually appealing layouts that are easy to navigate by using blocks to organise content.
Page Attributes
When editing a WordPress page, you can see a section called “Page Attributes” on the right side of the screen. This section lets you set the page’s parent, template, and order.
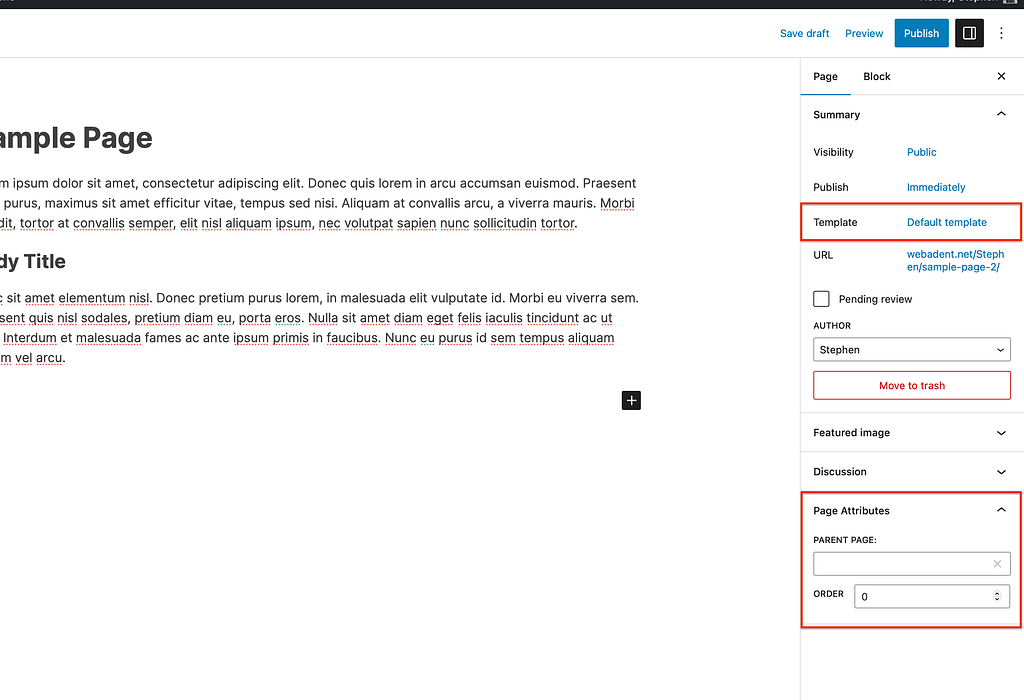
Parent
The “Parent” option lets you create a hierarchical page structure. By selecting a parent page, you can make the current page a child page of that parent. It can be useful for organising your content and creating a clear navigation structure.
Template
The “Template” option allows you to choose a specific template for your page. Templates are pre-designed layouts that can give your page a specific look and feel. Some templates may have different features or functionality, so choosing the right one for your needs is important.
Note: Some themes may disable the template option form showing under the page attributes. For this, the theme automatically sets the page template or can be adjusted under the theme customizer setting.
Order
The “Order” option lets you change how your pages appear on your website. By default, WordPress will display your pages in alphabetical order. However, you can use the “Order” option to manually set your pages’ order. It can be useful to highlight certain pages or create a specific flow for your content.
The “Page Attributes” section is a powerful tool for customising your WordPress pages. By using the “Parent,” “Template,” and “Order” options, you can create a well-organised and visually appealing website that meets your specific needs.
Publishing Your Page
Once you have edited your WordPress page, it’s time to publish it. This section will cover the steps to preview and publish your page.
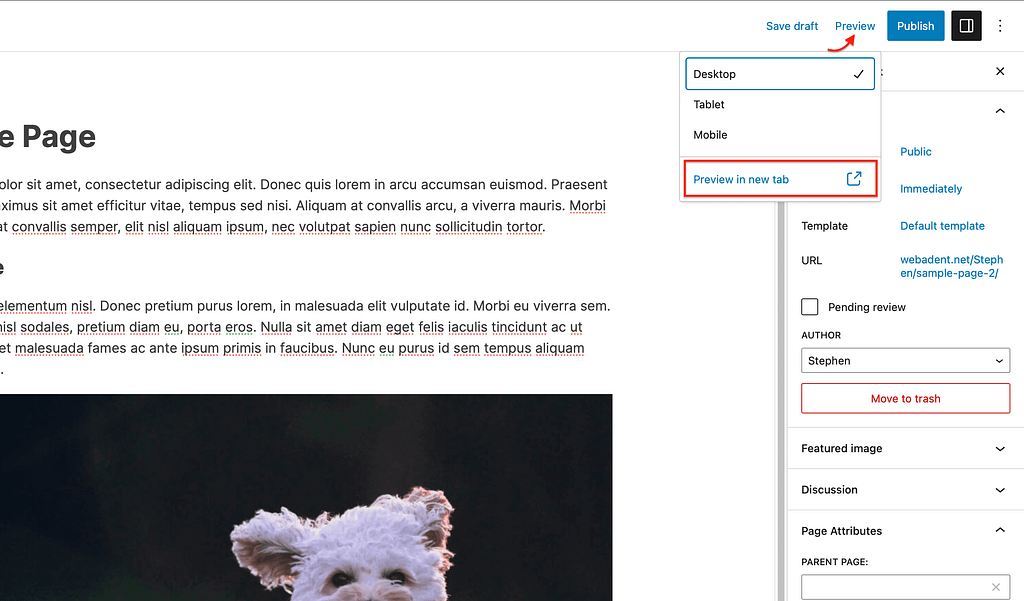
Previewing the Page
Before publishing the page, it’s always a good idea to preview it. As this ensures you see how the page will look to your visitors. To preview the page, click the “Preview” button on the top right corner of the page editor to open the page in a new tab with a preview of your content.
In the preview mode, you can check if the formatting is correct, the images are properly aligned, and the links are working. If you find any issues, you can return them to the editor and make the necessary changes.
Publishing Options
Once you are satisfied with the preview, it’s time to publish the page. There are several publishing options available in WordPress:
- Publish: This option will immediately publish the page to your website.
- Save Draft: This option will save the changes as a draft without publishing it.
- Schedule: This option lets you set a date and time for the page to publish automatically.
- Pending Review: This option will save the page as pending review, allowing other users with the appropriate permissions to review and publish it.
To publish the page, click the “Publish” button in the top right corner of the page editor. If you want to schedule the page for publishing, click on the “Edit” link next to “Publish immediately” and set the date and time.
Once the page is published, it will be visible on your website. You can always go back and edit it if needed.
In conclusion, previewing your page and choosing the appropriate publishing option is crucial to ensure your page is published correctly and at the right time.
Page Comments
WordPress allows users to turn comments on or off pages. By default, comments are disabled on pages, but users can enable them by going to the discussion settings of the page.
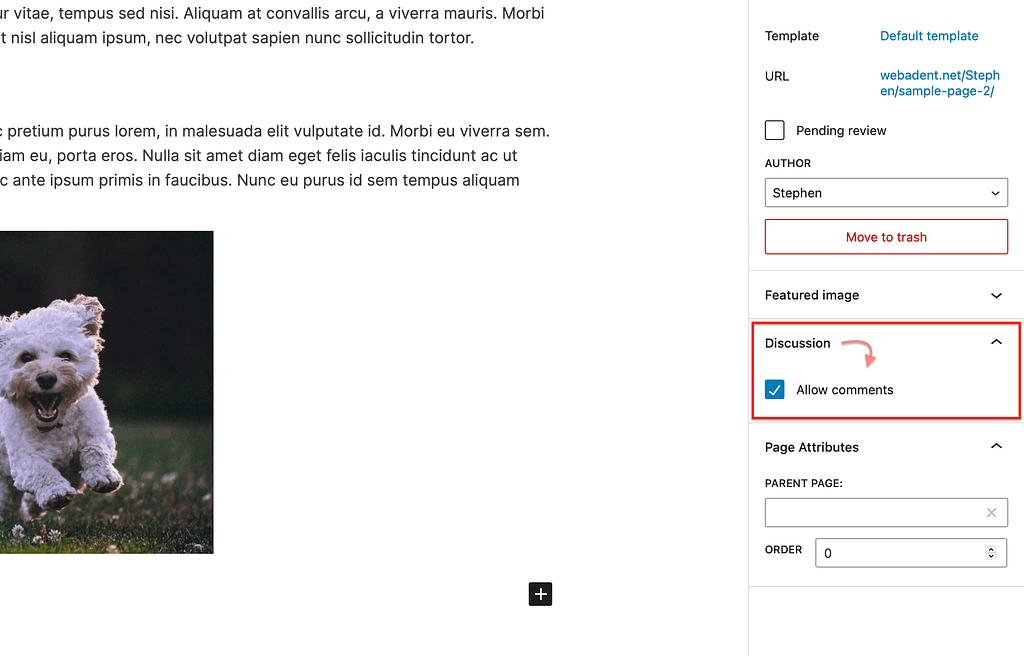
To enable comments on a page, navigate to the page editor’s Discussion section. Here, you can easily check the “Allow Comments” box to enable comments on the page. Users can also choose to allow comments only from registered users or turn off comments after a certain period. On the other hand, if users want to turn off comments on a page, they can uncheck the “Allow Comments” box.
In summary, turning on or off comments on pages in WordPress is a straightforward process.
Editing Existing Pages
To edit an existing page in WordPress, you can easily go to the Pages section in your WordPress dashboard and click on the page you want to edit to open the page editor, where you can change the page content, formatting, and layout.
Once in the page editor, you can use the formatting tools in the toolbar to make changes to the text, such as adding bold or italicised text, creating headings, or adding links. You can also add images or other media to the page using the Add Media button or image block.
In addition to editing the page’s content, you can modify other settings, such as the page title, URL, and visibility. You can easily access these settings by clicking on the Page Attributes section in the right-hand sidebar of the editor.
You can also change the template or assign a parent page using the Page Attributes section.
Finally, you can preview the changes you made by clicking on the Preview button in the top right corner of the editor to see how the page will look once it is published.
Overall, editing existing pages in WordPress is a straightforward process that allows users to make changes to their website content quickly and easily.
Frequently Asked Questions
How do I edit a WordPress page using Elementor?
What is WordPress full site editing, and how do I use it?
How do I edit a post page in WordPress?
What is the best way to edit a WordPress theme?
How do I edit a WordPress template without coding?
In conclusion, learning how to edit pages in WordPress is essential for any website owner, blogger, or developer using the platform. With its user-friendly interface and the power of the block editor, WordPress makes it easy for anyone to create and manage professional-looking pages. By understanding how to navigate the WordPress dashboard, customise page attributes, and utilise the block editor, you can confidently update your website’s content and keep it engaging for your audience. So, whether creating an About page, a Contact page, or any other static web page, now you have the knowledge and skills to make your WordPress website shine. Happy editing!